
これまでAndroidのアプリ開発はAndroidStudioにてJavaを使用していましたが、今後はKotlinにしようと思います。初めてKotlinを使用する方向けに最小限のアプリを今回作成しましたのでサンプルコードとともに紹介します。
Kotlinのプロジェクトを作成
AndroidStudioを起動して、メニューバー左端の「File」→「New」→「New Project…」を選択します。
プロジェクト作成用のウィンドが表示されるので、まずアプリの種類を選択し、「Next」をクリック。
(特にこだわりがなければ空っぽの「Empty Activity」を選ぶことが多いです)
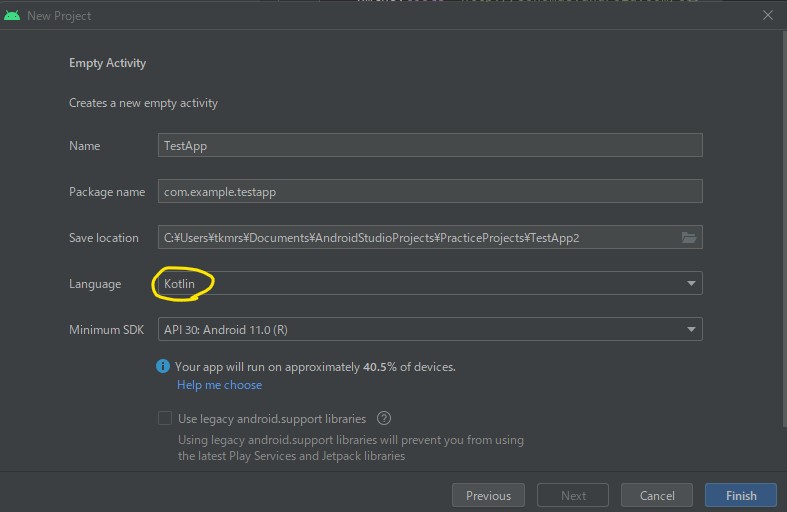
次にプロジェクトの名前や保存先を設定する以下ウィンドが表示されます。
ここで言語を「Kotlin」を選択します。
View bindingを使えるようにする
Androidアプリ開発では、GUIパーツにidを割り振り、それをJava側でfindVieBywId()を用いて参照して画面と処理を紐づける方法が使用されていますが、Kotlinでは非推奨なようです。
代わりの仕組みがview Bindingという仕組みです。
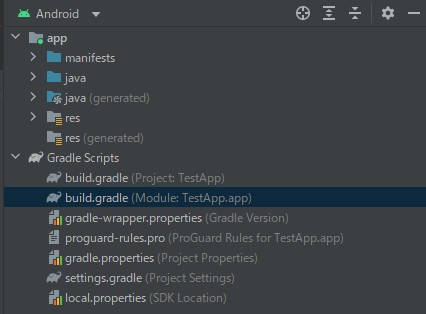
View Bindingを使うためには、AndroidStudioにてbuild.gradle(Module:ProjectName.app)を開き、以下のように編集します。
android {
    namespace 'com.example.testapp'
    compileSdk 32

    <・・・省略・・・>

    compileOptions {
        sourceCompatibility JavaVersion.VERSION_1_8
        targetCompatibility JavaVersion.VERSION_1_8
    }
    kotlinOptions {
        jvmTarget = '1.8'
    }
    viewBinding {
        enable = true
    }
}
追記後、AndroidStudioにて、「SyncNow」をクリックします。
これでView bindingを使用できるるようになりました。
Kotlinのサンプルコード
今回は簡単なサンプルを作成しました。
EditTextに入力した文字が、ボタンを押すことでTextViewに表示される仕様です。
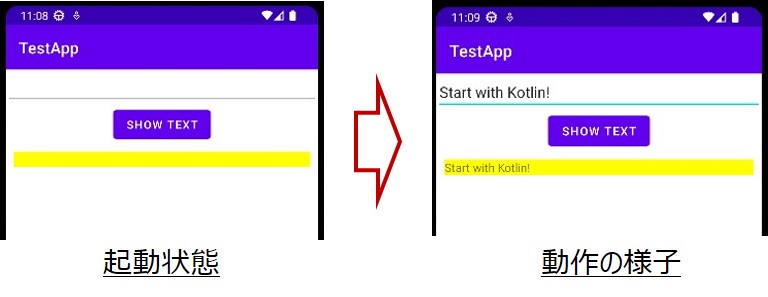
GUI側とKotlin側の連携が確認できるアプリです。
activity_main.xml
EditText、Button、TextViewを順番に配置。
それぞれにはIdを割り振ります。
<?xml version="1.0" encoding="utf-8"?>
<LinearLayout xmlns:android="http://schemas.android.com/apk/res/android"
    xmlns:app="http://schemas.android.com/apk/res-auto"
    xmlns:tools="http://schemas.android.com/tools"
    android:layout_width="match_parent"
    android:layout_height="match_parent"
    android:orientation="vertical"
    tools:context=".MainActivity">

    <EditText
        android:id="@+id/etInput"
        android:layout_width="match_parent"
        android:layout_height="wrap_content"
        />
    <Button
        android:id="@+id/btShow"
        android:layout_width="wrap_content"
        android:layout_height="wrap_content"
        android:layout_gravity="center"
        android:text="@string/btn_text"
        />
    <TextView
        android:id="@+id/tvOutput"
        android:layout_width="match_parent"
        android:layout_height="wrap_content"
        android:background="#ff0"
        android:layout_margin="10sp"
        />
</LinearLayout>
MainActivity.kt
色付きの行がview Bindingに関与しています。
package com.example.testapp

import androidx.appcompat.app.AppCompatActivity
import android.os.Bundle
import com.example.testapp.databinding.ActivityMainBinding

class MainActivity : AppCompatActivity() {

    private lateinit var binding : ActivityMainBinding

    override fun onCreate(savedInstanceState: Bundle?) {
        super.onCreate(savedInstanceState)

        binding = ActivityMainBinding.inflate(layoutInflater)
        val view = binding.root
        setContentView(view)


        //ボタンタップのクリックリスナー
        binding.btShow.setOnClickListener{
            //EditTextのテキストをTextViewに代入させる
            binding.tvOutput.text = binding.etInput.text
        }
    }
}
実際にview Bindingに活用しているのは、20・22行あたりです。
さいごに
今回初めてKotlinを触りました。言語どうこうより、単純にfindViewByIdを用いない点に違和感があります。まぁ慣れでしょう。
次回は、ClickListenerを分離して記述してみようと思います。onCreateの中に色々記述したくないので。


コメント