

Androidアプリからギャラリーに保存されている画像を取得して表示する方法を紹介します。何かとストレージへのアクセスがややこしいAndroidですが、ギャラリーは簡単に利用できるので容易に導入できるのが魅力です。
サンプルアプリ(Kotlin)の前提
GUIとKotlinの紐づけにはviewBindingを使用しています。
またボタンのクリック処理に関しては、リスナクラスを使用しています。


ギャラリーの画像をImageViewに表示するサンプル
ボタンを押すと、ギャラリーが起動し画像を選択し、その画像がアプリ内のImageViewに表示されるサンプルを作成しました。
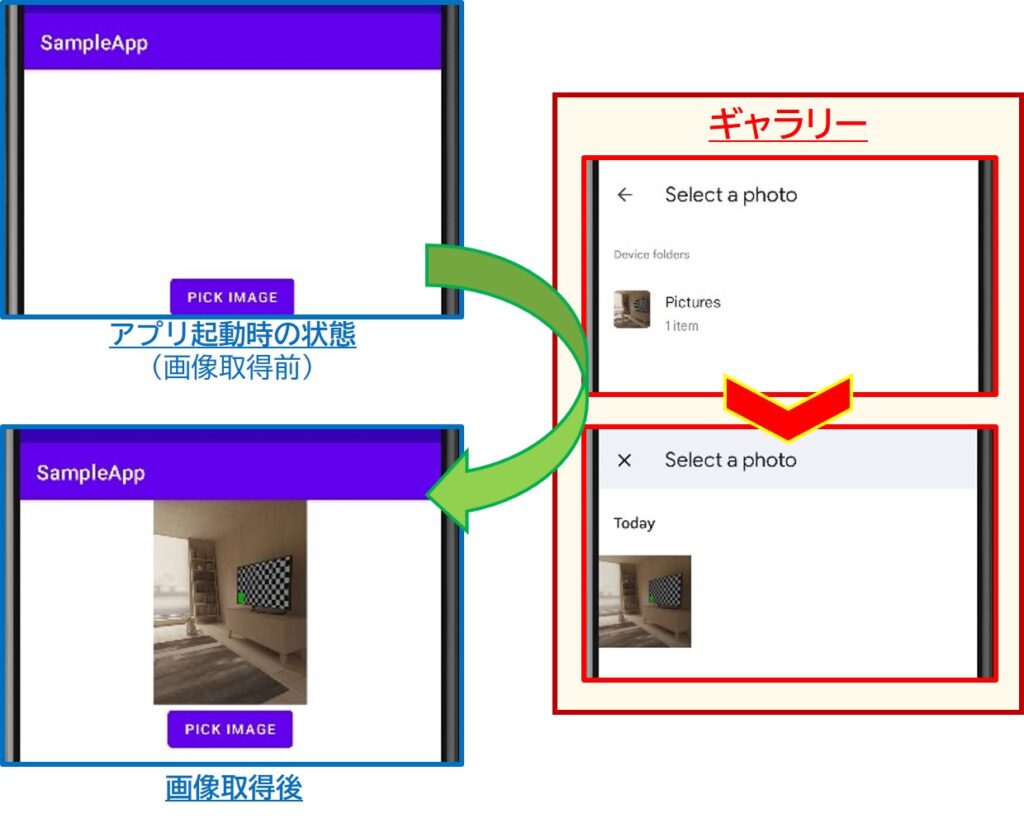
ギャラリーでは、「フォルダ選択 > 画像選択」と操作したので上画像では一応2枚分表示していますが、スマホによって違うかもしれません。
XML
画像表示用のImageViewとクリックイベント用のButtonを配置してます。
<LinearLayout
    android:layout_width="match_parent"
    android:layout_height="wrap_content"
    android:gravity="center"
    android:orientation="vertical">

    <ImageView
        android:id="@+id/ivPickedImage"
        android:layout_width="200dp"
        android:layout_height="200dp" />
    <Button
        android:id="@+id/btnPickImage"
        android:layout_width="wrap_content"
        android:layout_height="wrap_content"
        android:text="@string/btn_pickimage"  />
</LinearLayout>
Kotlin
Intentを用いてギャラリーを呼び出します。
Intent(Intent.ACTION_PICK)を使えば、アプリ外の共有情報を取得できるようです。今回は画像情報を取得するので、typeで「”image/*”」を指定します。
class MainActivity : AppCompatActivity() {

    private lateinit var binding: ActivityMainBinding

    override fun onCreate(savedInstanceState: Bundle?) {
        super.onCreate(savedInstanceState)

        binding = ActivityMainBinding.inflate(layoutInflater)
        val view = binding.root
        setContentView(view)

        // ボタンのリスナクラスのインスタンス作成
        val btnListener = BtnListener()
        // ボタンにリスナを設定
        binding.btnPickImage.setOnClickListener(btnListener)
    }

    // リスナクラス(ボタンのタップ処理)
    private inner class BtnListener: View.OnClickListener{
        override fun onClick(v: View){
            when(v.id){
                // ギャラリーから画像取得
                binding.btnPickImage.id ->{
                    // ギャラリーに遷移するIntentの作成
                    val intent = Intent(Intent.ACTION_PICK)
                    intent.type = "image/*"
                    // ギャラリーへ遷移
                    receivePicture.launch(intent)
                }
            }
        }
    }

    // ギャラリーから画像受け取り
    private val receivePicture =
        registerForActivityResult(
            ActivityResultContracts.StartActivityForResult()
        ){
            if (it.resultCode == Activity.RESULT_OK){
                // 画像を表示(ギャラリーintentから取得)
                pickedmageUri = it.data?.data
                binding.ivPickedImage.setImageURI(pickedmageUri)

            }
        }
}
さいごに
思ったより簡単にできました。
「ギャラリーを参照する」といったようなよく使う機能はちゃんと用意されているのがAndroidのいいところですね。逆にアプリ専用ストレージとかは複雑な気がします。


コメント